
The Cats’ House is an incredible feline playground that is home to 16 cats, 5 dogs, and their very kind humans. This cat friendly house has been done with a Japanese aesthetic—exposed wood, simple lines, minimal ornamentation. I love it!


News, Advice and Resources for Thoughtful Pet People
The Cats’ House is an incredible feline playground that is home to 16 cats, 5 dogs, and their very kind humans. This cat friendly house has been done with a Japanese aesthetic—exposed wood, simple lines, minimal ornamentation. I love it!


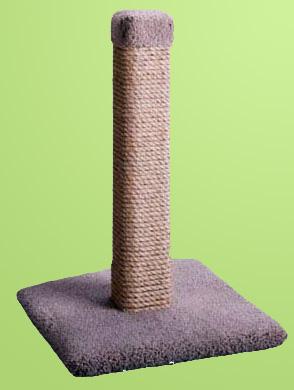
This is a pretty easy DIY scratching post for your kitties. It’s a little unusual because the column has a wider diameter than most posts. This is not accidental —the creator of the tutorial noticed her cats preferred scratching on things wider than their shoulders. The post is also extra tall so kitties have lots of room to stretch and it’s weighted with plaster inside so it’s quite stable. It’s all topped off with a padded perch at the top.
You should be able to find the supplies at a home improvement store—she even provides the parts # for the hardware. Nice! The author of a different cat post tutorial (linked to bellow) recommends using 3/8″ Brazilian sisal rope because it’s stronger, but more importantly because it’s less heavily oiled than other sisal rope.) You might also want to try woven sisal which will shorten the time it takes to cover the post. (I’ve ordered woven sisal from Natural Abode and been very happy with the product, price, shipping, & customer service. And no, I’m note connected to the company in any way.)
The tools needed aren’t hard to come by either. You will need:
Don’t miss these other DIY cat trees and scratching posts.

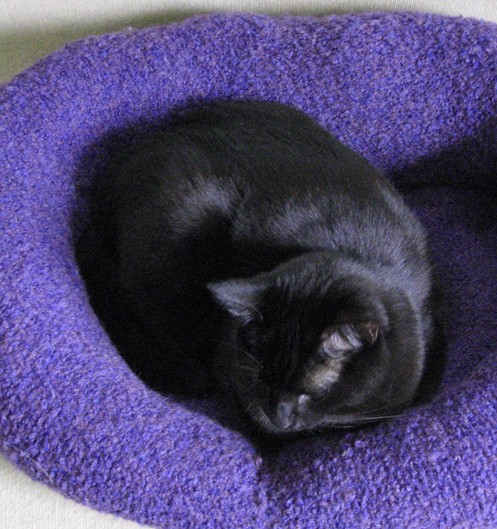


We can do more than just Reduce, Reuse, Recycle—we can help the environment and ourselves by “upcycling” things we can no longer reuse. Plastic grocery bags with too many holes become crinkly stuffing for cat toys. A sad, old pillow is transformed into a pet bed. A funky, old candy dish on a pedestal becomes a fancy, raised water bowl. Try using your imagination before you go out to buy new things for your pets. You might already have something around the house that will work as well or better than something new. Save money, help save the planet!
Some of my favorite DIY projects that Rethink, Repurpose, Recraft!
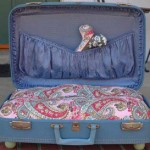
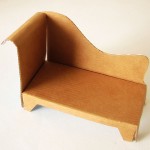
Beds & Furniture:
Clothing:
Poop:
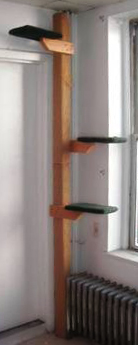
 Check out these great instructions for a beefy cat scratching post/cat tree. It’s a no-frills, utilitarian design, but it looks easy to build and that it will last forever. You can make it fancier by painting the shelf supports and by the color carpet you use to cover the shelves. And if you don’t cover the center post in sisal, you could paint it too.
You will need a drill, a saw, and a good staple gun (I recommend an electric one to make sure you get the staples sunk deep.) And be sure to stagger the shelves and make them large enough that your cat can actually climb the tree.
Don’t miss these previous posts on a DIY cat tree and a DIY scratching post.

Very clever design here! This cat scratcher by moderncritter comes with two carpet tiles by Flor (not your typical carpet tile) that can be replaced when worn out. If the standard Terra colors don’t work in your home, you can special order from Flor and come up with something really striking or something that will blend into the background. Remember to consider whether your cat prefers looped carpet or cut pile. Moderncritter recommends looped pile if you aren’t sure.
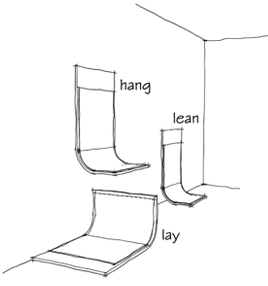 The plywood is finished in a walnut veneer and the carpet is attached to the plywood base with heavy-duty velcro making it easy to swap out new tiles. The scratcher can be deployed several ways. You can hang it on the wall creating a shelf. You can lean it against the wall or lay it on the ground depending on what you and your cat prefer.
(via apartmenttherapy.com)