DIY: Sleek Bunny Hutch

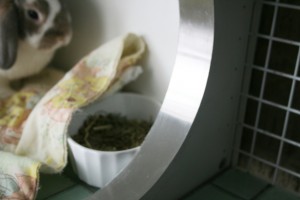
Last week, I had a post about a nifty dog crate coffee table with nice clean lines.  This week brings an attractive bunny hutch made by modifying an Ikea shelf unit.  For some reason, the instructions don’t appear on the tutorial page, so click here for the instructions and scroll down.

The clever people over at Design Curiosities started with Ikea’s Besta shelving, but you could adapt this to other media cabinets or sideboards of the right size.  The bigger, the better.  (Eames, the bunny for whom this was made, mainly just sleeps in his hutch and spends most of his waking time in an exercise pen.)

This customized hutch has great features.  I love the glass tile on the floor—so much easier to clean and keep looking nice.  On one side of the hutch they used a metal grid from The Container Store, but had to peel the rubber coating off and paint it.  That seems like a hassle.  I’d look for something similar from Home Depot or Lowes that was just plain metal.  The aluminum sheeting they used to finish the doorway in the divider looks great and will keep bunnies from nibbling on things they shouldn’t.  Always remember to use non-toxic materials and let the hutch air out after completion.

I just love pet furniture that looks great.  I think it means pets are more likely to be where their people are if their hutches, cages, beds, etc. aren’t some hideous thing people are likely to hide in a back room.  Neato!

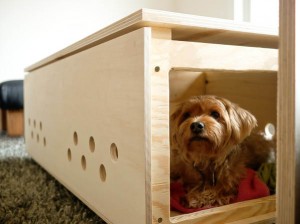
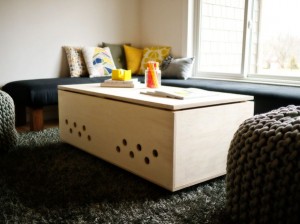
DIY: A Modern Pet Crate Coffee Table

I love this DIY pet crate!  Unfortunately there aren’t instructions, but it is fairly simple if you have some experience building things.  It’s made from plain plywood and has some features I really like:

  • internal divider with doors
  • the elevated lid for air flow also makes the piece look less massive
  • magnetic latches make the exterior sleek

DIY: 15 Foraging Toys For Birds!

Birds need mental stimulation just like cats and dogs and pretty much every animal.  Working for food is a great way to provide that stimulation.  It can also be a great way to get your bird to eat foods in usually rejects.  Wild birds spend most of their time foraging for food, so it’s a strong drive.  Enrich your birds life with ways to foster that drive.  Making your own foraging toys will help save you money too.  You may need to make it easy for them at first to get the treats, but they’ll catch on quickly.  Supervise your birds!

  1. A foraging toy for birds who haven’t learned to forage is this seeds-in-a-cork foraging toy.
  2. Put nuts, veggies, etc. in those little tiny cereal boxes or raisin boxes and let your bird tear into the box to retrieve the goodies.
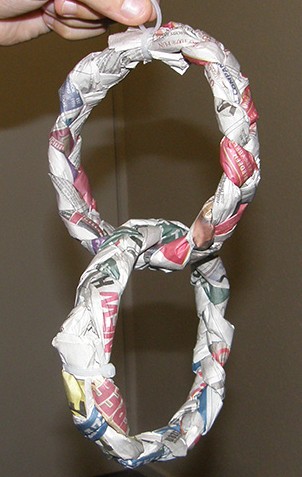
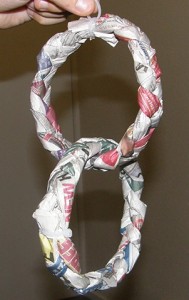
  3. 2 nifty foraging toys—one that doubles as a swing made from paper & another made with paper muffin cups.
  4. String uncooked pasta, veggies, or fruit you dried on string and hang in you bird’s cage.
  5. A recipe for seed kabobs on wooden spoons.
  6. Great foraging mat for birds who ground forage.
  7. Drill holes in a stick and stuff them with nuts or other treats.
  8. Video on 2 foraging toys—nuts & seeds pressed into untreated balsa wood, a treat in a small dixie cup then twisted shut.
  9. Wrap some treats in paper, stuff into an empty toilet paper roll, and fold the ends shut.
  10. Another version of the toilet paper roll toy uses Kiote Koins (dried yucca chips).
  11. Here’s a recipe for little popcorn balls on popsicle sticks.
  12. Wrap treats in coffee filters and tie shut.
  13. Clever idea to put unpopped popcorn kernels in small whiffle balls, wrap it damp paper towel and microwave a short time until the kernels pop inside the ball. (scroll to 2nd post)
  14. Super easy rice cake foraging toy.
  15. Brilliant stacked foraging toy made using origami.

DIY: 3 Different Cooling Collars

The Pacific NW is about the only place in the U.S. right now that isn’t blisteringly hot.  Not great for my tomato plants, but much easier on our pets.  For those of you who are roasting, check out these 3 different tutorials for making cooling collars.  Keep your pups comfortable and, most importantly, keep them safe!

______________________________________________________________________

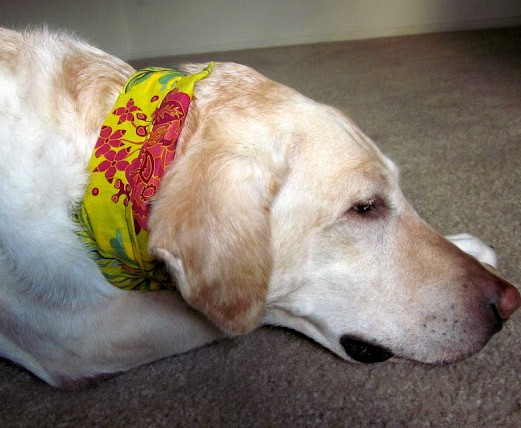
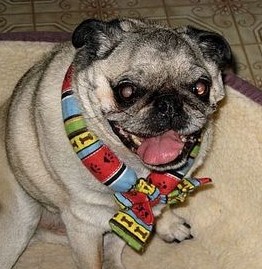
This first cooling collar is probably the simplest.  It’s a long, fabric sausage (with water absorbing crystals inside) that you tie around your dog’s neck.  If you have a bigger dog, you’ll need to make it longer.  Once it’s finished, soak the collar in water and let evaporative cooling do it’s thing.  The collar can be reused indefinitely.  (While water absorbing crystals (polyacrylamide) is considered non-toxic, I still wouldn’t let my dog eat it.  So use some common sense.)

______________________________________________________________________

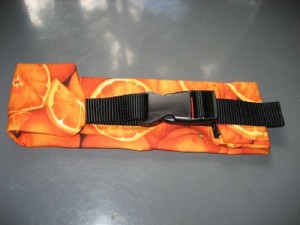
Cooling collar #2 is a collar in & of itself–it has a buckle–and is for a Lab-sized dog.  It could easily be downsized for a smaller dog.  This design uses either a strip of small ice packs or regular ice for cooling.  I like that it has a buckle—seems more secure.  This cooling collar is also reusable.  (Like with anything, you want to make sure your dog isn’t able somehow chew on the collar or another dog’s cooling collar.)

______________________________________________________________________

I think cooling collar #3 is my favorite design.  It uses your dog’s own collar to secure it.  It too uses a strip of small ice packs, but isn’t usable with ice.  Make sure to loosen your dog’s regular collar before sliding on the cooling collar.  Then place the cooling collar so the ice packs are next to you dog’s skin with her regular collar on top.  This collar is reusable.  (Again, make sure your pup isn’t chewing on her cooling collar or another dog’s cooling collar.)

______________________________________________________________________

DIY: Distance Logging Via GPS Dog Collar

Dear Internet, I freakin’ love you!  Through you I find fascinating people, learn cool things, and find neato-keen projects.  This geeky, crafty, cool dog collar has all three things going for it.  Yea!

Check out this nifty DIY dog collar project.  You get to solder AND sew!  Please note:  This collar is not for finding your lost dog because the collar doesn’t have a transmitter.  It is meant to track you & your dog’s progress & distance on walks.  You can map your walks or if you have a large property you can see where your dog spends her time by downloading the GPS data from her collar at the end of the day.

Here are the supplies and tools you’ll need.  Ladyada also has detailed information on the code & wiring used in the project.  And there’s a pdf of all the tutorial.  When you purchase from Adafruit Industries you help support open-source hardware.

The tutorial is by Limor Fried aka ladyada.  Limor is an MIT educated electrical engineer and owner of Adafruit Industries, supplier of parts & designer of kits for DIY electronics projects.  She’s an big advocate for open-source hardware.

Her user-name, ladyada, is a reference to Lady Ada Lovelace, a super cool woman in her own right.  Ada Lovelace was a mathematician, writer & translator in the mid 1800’s.  She’s widely attributed with writing the first “computer program”.  Awesome stuff!