
I made my own version of the pet bed made from an old sweater. It turned out great and the kitties love it. Actually Crow tried to use it while I was working on it. Saffron the dog thought it was for her—not sure if she thought it was a toy or a bed. I mostly followed the tutorial I posted about before with a couple of minor changes.
First, here’s a thumbnail of the sweater I used.

It had a rolled collar, so I snipped the thread tacking it down. I stitched the arms partway on as described in the tutorial. Then, instead of hand sewing the bottom hem, I folded it over about an inch and stitched it on my sewing machine. In the thumbnail below, you can see the seam is the white dashed line and the edge of the folded over sweater is the green dotted line.

I decided to make my bed more oval, so I folded the corners of the bottom hem up and stitched that with my sewing machine. You can see the shape of the bottom hem in the first thumbnail. The second is a close-up of the folded corner. The white dashed line is the seam and the green dotted line is the edge of the sweater that’s folded up.


I followed the rest of the instructions in the tutorial through Step 3. But, before I did Step 4, I traced the outline of the bottom of the bed onto an old mattress pad I had set aside for sewing projects. I cut out two layers of the pad and carefully inserted it through the neck and into the bottom of the bed. I proceeded with Step 4 and then tacked the bottom of the bed together to secure all the layers. I did about 5 stitches in the bottom of the bed—one in each “corner” and one in the middle. This will require a large, sharp needle. It was a pisser to get the needle and yarn through a layer of sweater, 2 layers of mattress pad, and another layer of sweater, but it’s doable.
I had washed and thoroughly dried an old pillow. I cut open the pillow and used its stuffing to fill the arms. After the arms were stuffed the way I wanted, I unrolled the neck & tucked it in on itself and stitched it closed with a slip stitch, also know as a ladder or invisible stitch. Check out this good tutorial on the slip or ladder stitch if you don’t know how to do it.
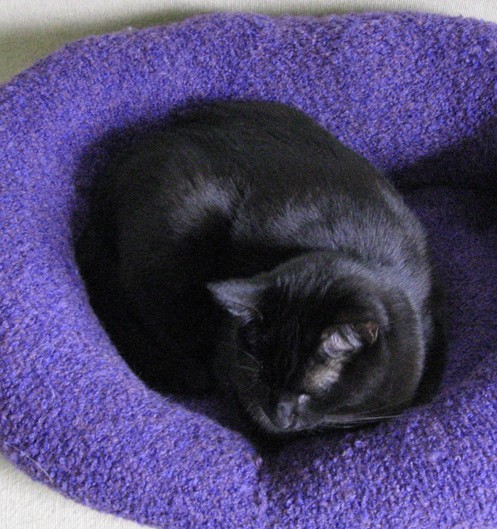
Here’s the finished bed. Because the sweater is a boucle knit my stitches pretty much disappeared, which is nice. This is an easy project and the tutorial is good. You can upcycle a sweater you don’t wear anymore or one from a thrift store and make a great bed for your cat or small dog. Or make a nice present for someone else.