Alternatives To Elizabethan Collars Round-Up

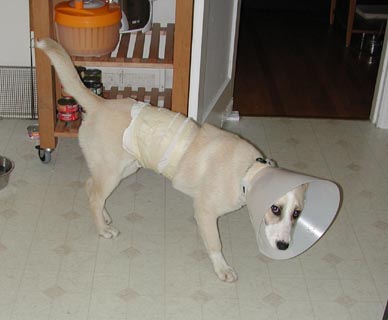
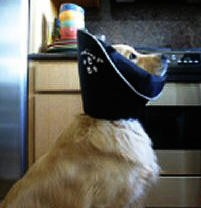
Saffron with Elizabethan collar

If your dog has a wound it’s not supposed to lick or worry, your vet will likely send you home with an Elizabethan collar.  They’re also called e-collars, lampshade collars, or cone collars.  Whatever you call them, they’re the pits and you won’t appreciate how awful they are until your pet needs one.  Animals wearing Elizabethan collars have reduced vision, run into furniture & walls, have a hard time reaching their food & water bowls, and have a difficulty getting comfortable—not what they need when they’re hurt or sick.

Just days after we got Saffron, we found out she hadn’t been properly restrained after she was spayed–in fact she rode home from the vet in the back of a pick-up. She had to have a compression bandage (that’s the towel with masking tape wound around it) and an Elizabethan collar. I think she worried about what kind of loony people she was living with now who would put her in such an crazy get-up.  E-collars add more stress to an already stressful situation, but you still need to keep your pet from licking or scratching or pulling out stitches.  The thing is, get one before you need it because you may need to order it and so you can make sure you have the right size.  Then if something happens you’re prepared.  Here are some other options.

__________________________________________________________
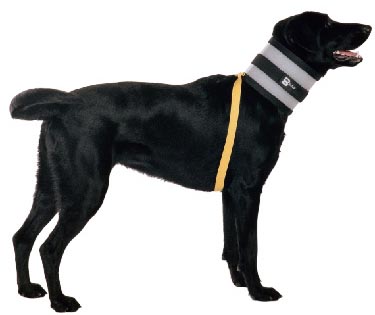
BiteNotCollar

The BiteNot Collar avoids all the problems that come with the Elizabethan collar like reduced vision, hitting furniture, etc. with the collar, and difficulty reaching food and water bowls.  It’s made from a length of plastic with good velcro closures.  The inside and edges are well padded with high quality foam.  It also has a strap that goes behind the front legs to keep everything in place.

__________________________________________________________
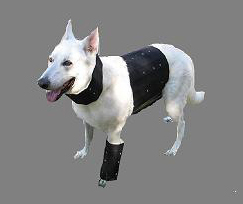
neckbestthing1.jpgThis collar doesn’t look quite as durable as the BiteNot Collar, but it is more versatile and looks useful for trickier tasks. You cut this collar to size and you can customize it. It can also be cut for a splint or used like a compression bandage for the abdomen. And it can be used on dogs, cats, even birds. (It was originally made for a bird named Hagar who had a feather plucking problem.)

__________________________________________________________
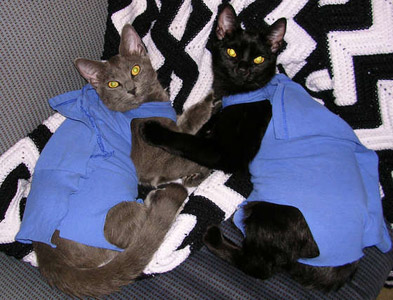
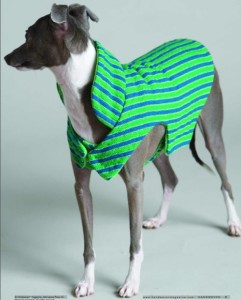
diybodysock.jpgHere’s a handy do-it-yourself alternative for protecting an incision or wound site on your pet’s torso from Instructables. You’ll find good instructions for making a body sock or “cat jacket” out of an old t-shirt.

This could also be used on dogs, rabbits, ferrets, etc. It might not be enough to stop an obsessive pet from messing with their stitches, but I think it would work with a lot of pets. A side benefit could be that wearing this body sock might help curtail their activity, which is another post-surgery need. Try it out!

__________________________________________________________
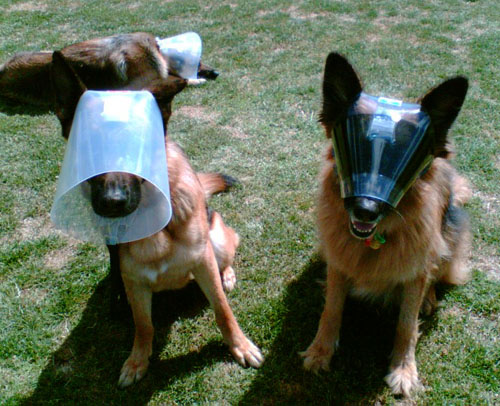
I love it when people care for their pets so much they’re not willing to settle for a crappy status quo. Tasi Stampoultzis developed the Optivisor for his dog, Billy.  Don’t miss this video of Billy showing off the Optivisor.

Other E-collar alternatives have addressed the need to keep pets from fussing with stitches, bandages, or wounds on their torso, legs, or tail, but so far nothing has addressed keeping a pet from scratching at their face or eyes. The Optivisor protects the eyes and the upper part of the face from scratching.  The Novaguard protects the whole face.  Both leave the ears free so the pet can hear, but that also means the ears are not protected, so if your pet is scratching its ears these won’t stop it. (Note: the sizing is for dogs, but I wonder if the smallest size would work for cats.) It looks like you have to get them from veterinary ophthalmologists.

__________________________________________________________

The Trimline Collar is a flexible, lightweight collar that is held in place with a drawstring.  Looks like it could work for a laid-back cat, but I’m not sure how well this will hold up to repeated uses by a dog.

__________________________________________________________
The Comfy Cone is a soft collar that can be folded down if needed and is held in place by your dog’s collar.  It’s made of a 1/2 inch of foam sandwiched between durable fabric and it has reflective tape for night time use.

PlayPlay

DIY: Woven Dog Coat

WovenCoatjpgRuth Morrison, a weaver from Tulsa, shared this pattern on Interweave Press a few years ago.  It’s originally from the Sept/Oct  2006 issue of Handwoven magazine.  If you’re a weaver, check out the very thorough instructions for weaving and sewing a cute coat for your dog. The weave is called Bedford Cord—it’s ribbed which makes air pockets that help insulate your pup.

If you don’t weave, but like the fit of the coat, there is a pattern and instructions on how to sew the coat itself.  Nifty!

DIY: Pet Bed Round-Up

Fall is in the air here in the Pacific NW. It’s getting chilly and our cats & dog are finding snugly places to sleep.  I may need to make a couple more small beds to keep the peace amongst the cats.  Here’s the collection of posts on DIY pet beds.

sweaterbeddoneA favorite spot for Sage is the bed I made from an old sweater.  Here’s a great tutorial on how to upcycle an old sweater into a pet bed and you can check out how I made my version of the sweater bed.


suitcasebed4Vintage suitcases make cute & clever pet beds.  This post has a bunch of tutorials and examples of these fun beds.


knitcatbed1 copyI would consider learning to knit just so I could make some of these beds.  You can knit & felt wonderful pet beds using the two great tutorials here.

.

crochetbedthumbIf you crochet, check out this pattern for crocheting & felting a nifty bed.

.

shrimpybedYou don’t have to be an expert in sewing to make this cute & easy nest bed.

.

hoodedbedSome cats & dogs like to burrow more in their beds and this tutorial on making a hooded pet bed is perfect.


cathamockA hammock for your small pet might be the best thing.  Here’s a post on how to make a hammock that can be free-standing or placed on a furnace to keep our pet good and toasty.


diyelevatedbedAnd if you need to get your pet off a cold floor, or if you’re in the Southern Hemisphere and need to keep your pets cool, this post shows how to make an elevated bed out of PVC pipe like Kuranda beds.

.

Meat Loaf For Dogs

wet ingredients
wet ingredients

This meat loaf isn’t meant to replace your dogs’ food—I’m not a canine nutritionist.  I’m also not militant that you should cook all meals for your dog.  I don’t cook all meals for our cats and dog.  I do fix a version of meatloaf for Saffron, our dog, for a few of reasons.  First, is to supplement her dry food with fresh, unprocessed food.  Second, is to make Saffron’s food more appealing to her so she’ll finish her food–she’s never been good about eating, especially if she’s anxious.  Third, this is cheaper than buying high quality canned food.

It’s easy to make, especially if you do it over two days.  I recommend prepping all the ingredients first and then mix & bake it another day.  I’ve been doing big batches, so I don’t have to do it as often, but I’m not sure it’s worth it since it can be a pain dealing with such large quantities.  I’ve adapted this recipe from Mabel’s Muttloaf. You can divide the recipe if you want to try a smaller batch.

Like with regular meatloaf, ingredients & amounts don’t have to be exact—my ratios are based on the 6 lbs. packages of ground turkey you can get at Costco.  Meat loaf is a forgiving dish and even if you’re not an experienced cook, you can make this.

You probably won’t need to go out and buy a bunch of ingredients.  And if you do need to buy some things, you don’t need to buy fancy ingredients.  This is a great chance to use up leftovers, the tail end of a bag of dry beans or rice, or slightly freezer-burned vegetables—nothing spoiled or nasty.  Take a look in your pantry & freezer and see what your dog would like in some meatloaf.

Ingredients:

  • 6 lbs. raw ground turkey
  • 1 large can (29 oz.) plain pumpkin
  • ~8 cups cooked beans or lentils
  • ~8 cups cooked rice
  • 2 1/2 lbs. frozen green beans (or some kind of frozen vegetable like corn, broccoli, peas.  I’ve even used frozen okra I had on hand.)
  • 1 lb. frozen spinach
  • 6 cups masa harina (finely ground corn flour treated so it’s more easily digested, you’ll find it in the hispanic section of your grocery or at a hispanic grocery)
  • 6 cups oats
  • ~1 cup brewer’s yeast
  • 1 cup oil
  • 6-8 eggs
  • ~6 Tbsp. Worcestershire sauce
  • ~ 1 cup ketchup
  • 2 tsp. salt substitute (potassium chloride)
  • enough liquid (stock, milk, whey, water) to bind it all together

Other possible ingredients:

    • cooked potato
    • ground beef, chicken, venison
    • liver or other organ meat (We have frozen beef liver on hand left over from a split side of beef we bought.  I thaw one, puree it, and add it to the mix.  Grossest thing ever, but Saffron loves it.)
    • cornmeal
    • shredded cheese
    • carrots, squash, sweet potato


dog loaf dry ingredients dog loaf mixed

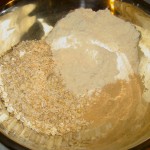
In a large bowl, combine dry ingredients. Roughly puree wet ingredients like beans, rice, vegetables, etc.  In another large bowl, combine wet ingredients. I put on latex gloves and mix with my hands.  Add the dry ingredients and make sure it’s very thoroughly mixed.  Add liquid as needed to get the mixture to form a thick, gloppy texture.  The mixture should be uniform in texture—no clumps of dry ingredients and no runny bits.

dog loaf in pan

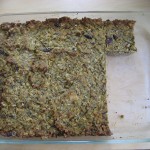
Spread into greased baking pans and cook at 350°F for about 1 hour.  It may take longer if your mixture was very wet.  You want the loaf to be pretty solid so the slices won’t crumble and fall apart.  Remove pan and allow to cool.  I cut mine while it’s still in the pan.

dog loaf sliced finished dog loaf

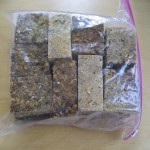
Place slice in empty pan or on a cookie sheet and freeze.  I store mine in double ziploc bags and thaw a slice in the microwave as needed. I crumble it up, add a little water, and mix it in with Saffron’s kibble.

DIY: Make Your Own Cat Litter Box

This post is one that gets a lot of comments and I’m tickled so many people have found it useful.  We’ve had our DIY litter boxes for at least 2 yrs. now.  We still love them—as much as you can love a litter box.  And they’re still in great shape.  Yea!

rbbrlitterboxtop.jpg

About a month ago, one of our two cats started peeing while standing up in their litter box. We were using a LitterMaid litter box at the time. My feelings about the LitterMaid were mixed. I appreciated not having to scoop the box all the time, but emptying the collection bin was a pain and cleaning the box was a real hassle. And while I was glad the cats always had a clean box to use, I really didn’t like that even after a couple of years, Sage would still come from another room to whack the rake when she heard it moving and often when Raven finished using the box, she’d come flying out of it lest the “monster” get her. Plus, scooping the litter boxes yourself is a good way to keep track of your cat’s health.

So first, I made an appointment with our vet to have the cats checked out since changes in urinary habits can be a sign of illness. And I bought a new litter box. The cats both got clean bills of health, but the stand-up peeing started happening more often. The new litter box leaked urine where the hood met the lid and made a smelly mess. I bought another litter box which had the hood sitting within the lip of the lower pan. Now the urine didn’t leak out of the box, but I had to clean the hood and the lip of the lower pan everyday. This was not working and we were out $60 on useless litter boxes.

It’s easy, cheap, and quick to make your own litter box. Here’s what you’ll need to make one yourself:

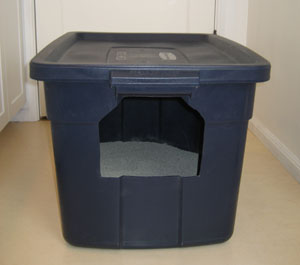
  • lidded, plastic container deep enough for your cat to stand in without touching the lid. I made a larger litter box using a Rubbermaid Roughneck Storage Box, Large, 25 gal, 28.8 x 19.7 x 16.5 in, which cost between $10-$12 from Fred Meyer. You can find these lidded storage boxes at thrift stores & stores like Target, Walmart, Lowes, etc.
  • permanent marker

Using a Sharpie, I drew freehand what would be the opening. Keep in mind that you’ll want the opening high if you have a cat that pees standing up. They’ll be less likely to pee with their rear-end hanging out the door. I put the opening at the narrow end of the box because that’s what our cats are used to and I think they’re less likely to pee out the door that way. Then I carefully cut out the opening with a utility knife. (Another option would be to cut the opening in the lid so that it looked something like this litter box by Clevercat.)

That’s all it takes! Fill the box with cat litter and replace lid for a covered litter box or leave it off if your cats prefer. Here are some thumbnails of how mine turned out.

rbbrlitterbox1.jpg rbbrlitterbox2.jpg

rbbrlitterbox3.jpg rbbrlitterbox4.jpg

I don’t think I’ll ever buy another litter box. I love that the lid is flat. It makes it easier to store it when I scoop the box—I just lean it against the wall. And when the lid is in place on top of the box, it provides a level area to store the scoop, bags, and cat litter. It has good handles so it’s easy to move. It’s big, so the cats are happy. The sides are high so there’s nothing to clean up if they pee standing up. You can get them in a few different colors. If you have the tools to cut harder plastic, you can get transparent storage bins. And it’s so much cheaper than buying litter boxes from a store!