DIY: Dog Raincoat From Upcycled Jacket

Are you sensing a theme with another raincoat post?  Yes, it’s still raining here in the Pacific NW.  I never thought I’d be someone who put a raincoat on a dog, but then I noticed that if it was raining on walks, Saffron would walk next to walls in their rain shadow and she’d linger a looong time under trees.  I realized if she were a feral dog left to make her own decisions, she’d be snuggled up under a porch or bush where it was dry.  Smart dog!  The least I can do is make her more comfortable, but her old coat is too short and doesn’t protect her ears at all.

So now Saffron needs a new coat and:

  • I don’t want to spend a lot
  • I can’t find a coat I’m satisfied will help keep her ears drier
  • I want a coat made from tough, weather-proof fabric not cheap vinyl
Quilted version

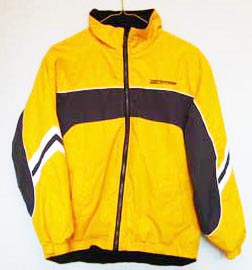
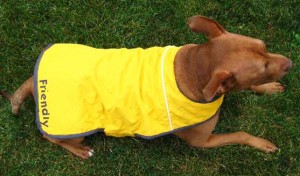
I’m going to have to make it myself, so I made a trip to my favorite thrift store and found an awesome women’s stadium coat with a hood for $9.99.  With the help of this great tutorial on how to make a dog coat from a recycled jacket, I’m going to turn it into a raincoat for Saffron.  I’ll let you know how it turns out!

In the meantime, check out the tutorial which can be used on any type of recycled jacket or with yardage.  There’s a printable pattern that’s in real size so you can print out the pieces, tape them together, & adjust the size to fit your dog.  And never fear, there are excellent printable instructions, that include tips on how to adjust the pattern to fit your dog.

(The creator of the tutorial is Diana Durkes from the super cool blog, Fine Diving–New Life For the Tossed & Found. If you’re in the Chicago area, check out her sister blog, Garage Sale Warrior.)
DIY: 2 Stuffed, Squeaky Dog Toy Projects

sweaterbonetoys copy

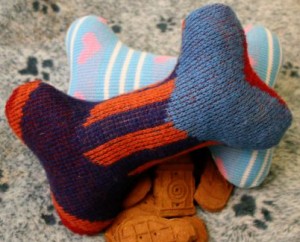
Here’s a great project to re-purpose old sweaters and turn them into squeaky bones from CraftStylish. If you use a wool sweater, you should probably felt it first.  If you don’t, then when you wash the finished toy, it may shrink into a MUCH smaller toy.  If you use cotton or acrylic, it won’t felt.  (Here are a few tutorials on felting, in case you need them: this one covers both hand & machine felting, here is a printable one on machine felting, and another on hand felting.)

You’ll need:

  • a clean, old sweater (yours, from a thrift store, etc.)
  • bone pattern–here are 3: bone #1, bone #2, bone #3
  • squeakers
  • sewing machine
  • thread
  • fiber fill or some kind of stuffing
  • a needle for hand sewing (here’s a tutorial for slip stitch for closing the toy)


Fabricbonetoy copy

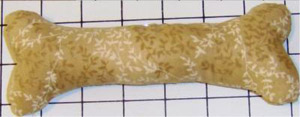
The second project is for a fabric squeaky bone toy. This isn’t a difficult project and the tutorial is thorough.  You can get some fun fabric for this.  If you want to be thrifty, check the remainder table at your fabric store or check for yardage at thrift stores.  If you use a lighter cotton, you should use an inner layer of a heavier fabric like canvas or muslin.  Upholstery fabric could make some neat toys and you don’t need to buy much.

You’ll need:

  • fabric (check the remnants table & thrift stores)
  • heavier fabric like canvas or muslin if you use a lighter weight fabric for the outside
  • bone pattern–here are 3: bone #1, bone #2, bone #3
  • squeaker (the tutorial calls for a rattle)
  • sewing machine
  • thread
  • fiber fill or some kind of stuffing
  • a needle for hand sewing (here’s a tutorial for slip stitch for closing the toy)