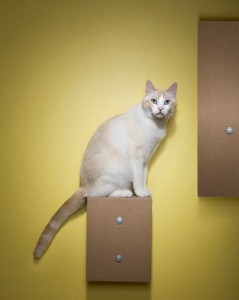
 I think this happens every Fall. The days start getting shorter and somehow my I’ve-Got-To-Make-Something! button gets pushed. Here’s the first DIY post in a long time—how to make a cardboard cat “tower” that hangs on your wall.
This is a great idea, since it doesn’t take up floor space, doubles as a cat scratcher, doesn’t cost much to make, can be customized, and can double as art. How cool is that?! You can use cardboard you have or you you can buy sheets of it. I would treat the “face” of the cardboard (the part that faces the room) so that it’s more aesthetically pleasing by painting it or by applying wallpaper, decorative paper, or fabric. This tutorial shows how to make your cat a happy camper!
You’ll need:
- jigsaw
- glue gun
- Corrugated cardboard pads measuring 36″×48″ (The tutorial notes these are available in bundles of 50 from http://www.uline.com/.) Or you can use what you have on hand as long as you have enough to make your piece 35 sheets thick. You may have to adjust the shapes you make depending on what you have.
- hand saw or reciprocating saw
- 3/8″ and 9/32″ wood drill bits, 6″ or longer
- power drill
- (4)–3/8″ washers, 2″ diameter
- ratchet with 1/2″ socket
- (4)–8″×3/8″ lag bolts
- pencil
- carpenter’s glue
- paint brush
- wallpaper brush
- trim guide
- sharp utility/camping knife
- level
- 48″ ruler
- heavy objects to weigh down glued boards

That’s funny. My Felix would love that 🙂
A great toy for cats indeed!