DIY: Cardboard Catnip Castle For Your Wall

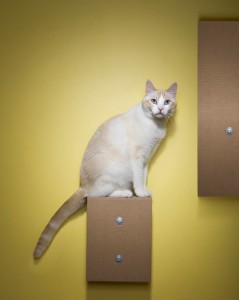
I think this happens every Fall.  The days start getting shorter and somehow my I’ve-Got-To-Make-Something! button gets pushed.  Here’s the first DIY post in a long time—how to make a cardboard cat “tower” that hangs on your wall.

This is a great idea, since it doesn’t take up floor space, doubles as a cat scratcher, doesn’t cost much to make, can be customized, and can double as art.  How cool is that?!  You can use cardboard you have or you you can buy sheets of it.  I would treat the “face” of the cardboard (the part that faces the room) so that it’s more aesthetically pleasing by painting it or by applying wallpaper, decorative paper, or fabric.  This tutorial shows how to make your cat a happy camper!

You’ll need:

  1. jigsaw
  2. glue gun
  3. Corrugated cardboard pads measuring 36″×48″ (The tutorial notes these are available in bundles of 50 from http://www.uline.com/.) Or you can use what you have on hand as long as you have enough to make your piece 35 sheets thick. You may have to adjust the shapes you make depending on what you have.
  4. hand saw or reciprocating saw
  5. 3/8″ and 9/32″ wood drill bits, 6″ or longer
  6. power drill
  7. (4)–3/8″ washers, 2″ diameter
  8. ratchet with 1/2″ socket
  9. (4)–8″×3/8″ lag bolts
  10. pencil
  11. carpenter’s glue
  12. paint brush
  13. wallpaper brush
  14. trim guide
  15. sharp utility/camping knife
  16. level
  17. 48″ ruler
  18. heavy objects to weigh down glued boards

DIY: Round Recycled Cardboard Cat Scratcher

I’ve always thought I should make my own cat scratchers out of the cardboard boxes we have collected.  It seems crazy to buy cardboard scratchers , because–Hello?!  You want how much for what’s basically pieces of cardboard glued together??!!  But, I also wasn’t thrilled with the prospect of hot-gluing a bazillion strips of cardboard myself.  That would seriously get in the way of reading the subtitles for the Korean dramas to which I’ve gotten addicted.

This lovely tutorial is for a round cat scratcher! You have to coil the strips of cardboard tightly and then just tape the ends.  Sweet!  I can do that and read subtitles–no problem!  You can decorate the outside edge of the scratcher too so it doesn’t look like some freaky hunk of cardboard in your living room.  It’ll look like a decorated freaky hunk of cardboard!

DIY: Cat Towers From Ikea’s Stolmen

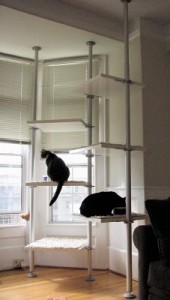
One of the things I’m not crazy about with most cat stands is how big & clunky they are–they can take up a lot of space.  That’s why I’m liking these Ikea hacks you can make yourself with 2 Stolmen poles and shelves.  And if you want something sleeker, you can buy nifty shelves specifically for making a cat tower using just one Stolmen pole.  Not only do these cat towers look less massive than traditional cat stands, they have a very small footprint, and even cooler—you can change them around to keep your kitties intrigued.

This first DIY project is pretty straightforward and uses just Stolmen parts. See how the shelves are stair-stepped so the cats will have an easy time climbing up.


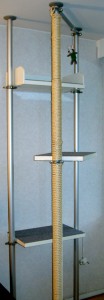
The second DIY project is a little more involved–but super easy– and includes a great scratching post. The original plans are in Finnish, but here’s a translation of the plans to give you some more information on how they made their tower.


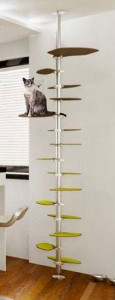
The Hollywood Franklin Tower from designer Peter Sehorsch is a more streamlined version that uses only one Ikea Stolmen pole.  They make 2 different sized shelves, come in different color stains, and are covered in carpet from Flor.  Their site is Flash intensive and irksome, but their design is worth looking at.  If the Flash bugs you, check out the pdf to see the niftiness.